Erin Pimm Photography

Erin Pimm Photography
Glam the Dress

Wednesday, 27 March 2013

Tulle Skirt DIY Tutorial

Ive been in love with tulle skirts since I cant even remember... I think its the unrequited love of ballet and never having taken a single lesson and not getting to wear one until I started fabricating my own costumes.

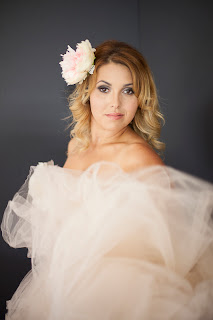
I found this absolutley lovely tutorial online that I know you will love. I used just agather stitch at the top then gathered to the length and fullness I wanted then sewed on the blanket ribbon (doubled over) and tada!
The flowers btw you can find on last weeks blog Here: DIY Silk Flowers


I wanted to share this  tutorial from Cotton and Curls:


Supplies:
6-13 yards of tulle
1.5 - 2 yards of lining - I used a thin knit that matched the tulle perfectly
elastic the width, when stretched, to the natural waist
scissors
thread
pins
optional - static guard
Instructions:
1. How much and what kind of tulle to buy - find the softest/flowy-est tulle you can. I found some for $.75 a yard at Ja-anns. Mine was still pretty stiff, but after some washing, ironing and some static guard, the tulle softens up a bit.
*6 yards - If the width of the tulle (selvage to selvage) is 54" you can use 1.5 yards per layer, do at least 6 yards if you want 4 layers and the skirt to be around knee length at the longest (unless you are really tall or you have wider hips).
*13 yards - If the width of the tulle is less than 54" or you want the skirt to be longer oryou have wider hips, or you want to be safe (I bought 14 yards originally) then you will need to buy more.
***I did the two bottom layers the first way, by folding 1.5 yards in half and not gathering the waist. and the top two layers I cut individually from the 2 pieces of 60" laying on top of each other,  so I can cut deeper into the waist for a greater gather.
2. Cut the tulle into the circle or half circle depending on the size you're going for with these two simple calculations. The easiest way to do this is to take a longer measuring tulle (can reach at least as long as you need) and put one end at the center of the fold where the center of you waist will be and cut a half circle out by slowly sliding the measurement devise around like a rainbow or half circle. then to do the waist, repeat with the radius of your waist size.
 For the bottom two layers and the lining, you won't gather the waist to help the skirt not be too poofy. To cut this out of the tulle fold the 1.5 yards of tulle in half, (unless you are going to use more then do the 60" on 60") and mark out a half circle from off the fold - take your hip size divided by pie (3.14), then divided by 2 gives you a radius. Then add that radius to the length you would want the skirt. 
hip / 3.14 / 2 = Radius + skirt length = half circle template for non-gathered layers
To do the the top two gathered layers you need to do the same equation as above, but add 2-4 inches to the radius to create the gather for the waist. But you still need to make sure the length of the skirt equals the same length of the skirt's above  even though this one has a deeper waist.
hip / 3.14 / 2  + 2"-4" = gathered waist's radius + skirt length = half circle template for gathered layers
-After you have cut the half circle or whole depending on your folding/tulle amount you need, cut out the waists.
3. Once you have cut them all out, sew up the sides to complete the circles if you used the second method of cutting (when you are using more tulle). Check out the dotted lines in step 3 of the diagram.
4. Gather the waist's of the top two gathered layers to your hip size by sewing a basting stitch along the top knotting it at one end and not the other. Gather the skirt by pulling the thread to your hip size. You can see that in picture picture 4.
5. Sew the 4 tulle layers together with a straight stitch.
6. Sew the elastic's ends together, try it on and make sure it fits snug and it can slide over your hips.
7. Sew the lining to the elastic with a zig zag stitch. Do this by placing the wrong side and the raw edge of the lining to the elastic, then stretch the elastic to fit the opening of the lining. There will be a little of a gather from the elastic.
8. Repeat step 7 with the tulle layers.
7. Trim the excess fabric.
9. Flip the elastic over the newly trimmed raw edge to hide it, so the top of the elastic, will now be the bottom. Sew the lining down to the bottom of the elastic on the inside of the skirt.
---no hemming necessary, tulle doesn't fray. You may need to hem the lining if you used a fray-able lining. Mine was knit so I didn't need to.

Friday, 22 March 2013

Erin Pimm Photography: Make your own silk flowers for fashion

I wanted to figure out how to accessorize some fabulous outfits I've been making recently for my couture glamour photography business over at erinpimm.com.

made by Erin @ erinpimm.com

So I started the search... DIY silk flowers...there are always crafty people out there ready to Youtube thier cottage crafts...

Here are 2 DIY flower tutorials for yuu...ENJOY!If you are interested in more DIY, glamour photography fashion ideas, follow my blog post...theres lots more to come!!


These elegant fabric flowers are very simple to make . . . and only take a few basic supplies. The finished product is delightfully lovely, and at times can look like a real flower! Every flower will turn out differently and that is part of the beauty!
If you haven’t used those tea lights in a while, now’s the time! I hope you enjoy making these as much as we do . . . below are instructions with pictures on how to make your own.
Fabric Flower Tutorial: Supplies
Supplies:
· Synthetic Silky Fabric
· Scissors
· Candle (preferably a tea light)
Additional supplies:
· Needle and Thread, Glue Dots or Glue Gun
· Buttons and/or Beads
Directions:
Fabric Flower Tutorial: Step 1
1. Cut circle patterns out of card stock.
Make the largest one’s diameter about half an inch larger than you want the diameter of the flower, as the petals will end up shrinking a bit. Create a few of these, lessening the diameter bit by bit so that the end result has smaller petals in the center and larger ones around the outside. You can also use a pattern here, which works very nice!
Fabric Flower Tutorial: Step 2
2. Trace around the pattern onto the silk fabric (using a pen).
You can also cut around the pattern and skip the drawing part, it just might not be as uniform . . . but with these, uniform isn’t necessary. And if it’s not uniform, it adds character. And character is good.
Fabric Flower Tutorial: Step 3
3. Take the scissors and cut out the circle and petals.
Cut just inside the drawn lines to make a circle out of the fabric. Carefully cut only about a third of the way into the circles to create the petals. You can do as many or few petals as you would like, or even add some variety to them. I cut five times, making five medium-sized petals. You can also round the corners of the petals, if you so desire.
Fabric Flower Tutorial: Step 4
4. Use the lit candle to melt and crinkle the edges.
Be very careful (please have adult supervision, this is rather dangerous), as it is very easy to get burnt. Hold the cut petals about one to two inches above the flame, making sure to keep the circle rotating so that it does not overheat and catch fire. Continue to gently melt the edges of each petal until you have gone all the way around. Do this with each layer.
Fabric Flower Tutorial: Step 5
5. Sew (or glue) the petal layers together.
Using a needle and thread, create a beginning knot and then sew the layers together. You can come up through the top because the center  of the top layer can be covered by a button or  bead. To finish the flower, sew (or glue) the button or bead on top.
If you would like to add extra stability to the flower, you can sew or glue a piece of felt onto the back (make sure it is large enough to give good stability, but small enough so that it won’t be seen from the top).
For a hair accessory, you can sew or glue the back of the flower to the back of a bobby pin, ponytail holder, or snap-clip.
For a broach, you can sew or glue them onto a broach pin or even a safety pin.
And the list could go on of how these flowers can add extra beauty!
What are some of your ideas?
And remember: every flower will turn out differently and that is part of the beauty!

Ribbon Flower Pin Tutorial

IMG_3212
I thought with pretty good certainty that the last corsage I would ever pin on was at Senior Prom in High School.
But I was wrong.  A few weeks ago I visited the Quilting Cottage in American Fork, Utah.  I love the Quilting Cottage, which is not only a quaint little store, but they have a wonderful selection of fabrics.  While there, I spoke with Wendy, one of the women who works there…
She was making ribbon flower pins for an upcoming wedding.  The fabric flowers look a lot like the ones they sell at Anthropologie, but hers are a fraction of the cost.  They were so darling I would happily wear one.
Wendy was kind enough to teach me how to make these fabulous fabric flower pins.  Here’s what you need:
IMG_3108
  • 2-4 yards of wire ribbon (depending on how large and tight you want your flower) (I used one and 1/2 inch wide ribbon.)
  • quilting thread or other strong thread
  • small amount of felt
  • hair clip or pin (or both)
IMG_3113
1.  Pull on the wire of one side of the ribbon to ruffle.  Ruffle the entire length of your piece of ribbon.  Not all wire ribbon is the same.  Some are more fragile, so pull gently.  Leave a few inches  wire hanging out from the ends, but clip away the rest to get it out of your way.
IMG_3114
2.  To start, fold your ribbon back on forth a few times (on the side of ribbon which you’ve just pulled the wire).  Using quilting thread run a stitch through the ribbon several times to secure.
IMG_3118
3.  Start wrapping the ribbon around.  Secure each wrap by stitching all the way through the layers in a star pattern.
IMG_3130
4.  Once it is large enough to be difficult to stitch through all the layers, secure by stitching to the previous layer.
IMG_3138
5.  When you come to the end of the ribbon, fold the the corner of ribbon back inside to hide the raw edge.  Stitch into place.  Cut off any excess wire hanging out of the ends. IMG_3148
6.  Cut a circle out of felt to cover the back of the flower.  I cut a second layer of felt in a wide strip and secured it with a zigzag on each side.  That way I could easily slip in onto a hair clip or a pin.
IMG_3155
7.  Stitch the felt into place on the back of the flower using a blind stitch.
IMG_3169
I love how this flower pin turned out.  I used 4 yards of fabric for this flower, and made it fairly dense.  It looks just like the peonies blooming in my garden right now.  And it was fast and easy… my kind of one evening project.  I’m off to make several more as gifts right now…

Thursday, 7 March 2013

Building Building Building LAUNCH Erin Pimm Photography!

Last week it began, this week it continues and next weeks the final touches. The studio has more or less been built (with some chzuzzing still to come). Our video is done. Showreel complete.

Marketing materials - CHECK!
Brochures - CHECK!
Intro Letter - CHECK!
Gift BOxes - CHECK!
List to send to -CHECK!

Nerves? TRIPLE CHECK
So Hum - my mantra last week = fierceness and determination. CHECK (kinda).

So where am I really at? Getting myself out there. Thats the tough part!
Here is Miriam from our showreel...is she not AMAZING?
Erin Pimm Photography
Miriam Fathalla by Erin Pimm Photography

Erin Pimm Photography
Miriam Fathalla by Erin Pimm Photography

So here we are. Go time. antacid check...clients can come on over any time now PLS!!

Saturday, 29 December 2012

Portrait Couture - Gone with Glamour...


So here is the crux, or apex, or opportunity. The commitment. The forge ahead moment where your heart leaps into your throat, you bite the bullet, put your money where you mouth is a step into the fear
aka
Launching Your Business 2012 (aka stain your shorts)

Portrait Couture

I am taking the plunge. I am putting that commitment into the light and shining it out. I am a successful photographer and this is going to be the proof in the pudding.
Ive been studying Sue Bryce and her coined (love it BTW) Portrait Couture. Gone is the bygone sticky term of glamour portraits. In fact, I still have this horrid vision in my head of mall studios taking terrible flash photography with some creepy old dude leering at the images behind the screen (because you know they are doing it at TSA), or Robin Williams...well I'll just stop there.
Sue has an incredible innate sense of what women want and EXACTLY how to service that. She is one of the most successful portrait photographers not only in Australia (she won AIPP Portrait Photographer of the Year) but in the world now. Between www.inbedwithsue.com, www.creativelive.com, she has come into her absolute primetime, amazing teaching with something like 8? full days of teaching via CL and darn it all if Im not TOTALLY jealous that she gets to be back in my hometown teaching. Just MONTHS after I personally moved away from Seattle. I would give just about anything to attend a workshop of hers.
So, I have spent months now studying her. Watching every workshop over and over. reworking, taking images, learning, practicing, and now here we are. Ground Zero. And its a go.
So. Blog up, write, shoot, market, draw, photoshop, details, planning, building, shifting, moving and a little shaking...
See you on the other side...very shortly ;))

Sunday, 23 December 2012

Victory, Paige, and the Great Ocean Road

Every once in a while life grabs you by the down-belows and gifts you an opportunity you just cant pass up. Or perhaps you are the co-creator of such adventure. However you got there, its a chance to ride free, let loose, hang ten, shift up, and get the breeze flowing. 


Paige Phoenix sporting the Victory Motorcycles.
Paige and Erin on the Great Ocean Rd
Last weekend I was priveledged to have such an afternoon out riding with Paige Phoenix. After being given a brand new 1800CC Victory Motorcycles touring bike, we decided to take it for a jaunt along the Great Ocean Rd, with a few stops for the necessary coffee and gratuitous images. The sun was shining, I had a hawt leather jacket on, riding on the back with camera in hand...ahem...and the GoPro mounted to the front window to capture the windy stretches between Anglesea and west of Lorne. 

Thats the way to spend your Saturday afternoon...


Monday, 25 June 2012

Monday Blues, Doldrums and breaking OUT!

Its Monday. Dreading it somehow. My shoot cancelled and my bed is calling...so what did I do today? I wasted 4 precious hours trying to finish the design of my new business cards. Its harder than you think. Im sure you can understand.  Every company has different sizes, bleed lines and you think you FINALLY have it done, just to upload it and find that its gets chopped off JUST at the exact wrong place. Bugger. So you go back, change and re-upload. After a whole lots of cursing and explicatives, its done and dusted. Passed on the fridge magnets and coffee cups this time, but who knows...maybe I'll be back there someday.
Next is something pretty personal I have to say. I think that as a commercial style photographer I can follow and brief and capture what is being asked of me. But I am feeling compelled to step out of that comfort zone these days. I dont event know what you would classify as fine art, but I think I need to explore that side and be more adventurous. I have some ideas brewing, some people Im gathering and hopefully if the brooding weather coopertates, I'll be able to get out and do the first image this week...putting ideas into action are alot more difficult than it may appear. And if its easy, why bother?
Werribee Mansion & Spa
Winter is here in full force, so here I go...bundled up and ready for action!

Wednesday, 13 June 2012

To Market or NOT to Market...that is ONE of the questions this week...


Perhaps you have heard of this most recent self marketing guru named Ramit Sethi (www.iwillteachyoutoberich.com). If you havent - you SHOULD - IMMEDIATELY!

Many years ago I started down the self help path (aka spiritual path/self awareness/self improvement - whatever you choose to call it). Have studied a wee bit here and there and have integrated many bits n bobs of technology, advise, and of course a mainly autodidactic method of study.
So its when i came across this guy that I started to get SERIOUSLY jazzed again about my self learning path.
Many people need to have it all spelled out in front of them. They need someone to hold thier hands all the way. And in sorts of ways Ramit does that for you. But you have to reaaaaallllly want it. I mean really. Both on the commitment side to money, time, and personal achievement. In other words. You gotta want to be a winner. The last program on offer from him - Dreamjob - costs $4000. A miniscule investment in the long run for you financial and spiritual satisfaction.

I missed out on it. But. Its not too late. I can do what I can figure out and learn  - I love workshops, they are a great way to update your knowledge (AIPP does great continuing education), www.creativelive.com just did a great marketing course and of course you can always get your RSS feeds up to date with the most current blogs and websites offering free marketing information.

What is my point you might ask?

It's not going to come to you while you are sitting on your arse complaining. You HAVE to be aggressive and go out and SELL yourself. Work all your networks and when they are exhausted, go network some more. Send out letters,  follow up calls. Plan on spending several hours every week blogging, updating your Google+ and facebook page with new images. Intertia will carry you the rest of the way. If for no other reason, it gives you a day at home in bed with your pajama on ALL day.

Freebies - there are TONS of them out there for information and marketing purposes...perhaps that should be my next post...phew.

Oh...and dont be afraid to ask for what you want. A little effort goes a loooong way in this business.